This tool is designed to capture real-time assessment of a simulation participants’ performance. The tool is based on Miller's Pyramid[1]. It should be used to capture what is happening during a simulation or live patient encounter and is a tool to help debreif the event. Helping the learner reflect on their gaps in knowledge or practice.
As the grid is designed, bear in mind, the purpose of each column:
- Knows: attests the participant has baseline knowledge, example: Attends didactic learning associated with topic.
- Knows How: indicates the participant can utilize the knowledge, example: Can Identify abnormal vital signs.
- Shows How: stipulates the participant matched knowledge to a situation, example: Establishes Safety net: places patient on cardiac monitor, obtains IV access.
- Does:reveals the participant exercises clinical judgement, they can use knowledge in the appropriate situation and initiate the next steps, example: Identifies a patient in critical condition, obtains an MD, communicates concerns.
This tool is designed to measure performance from basic knowledge (Knows) on the left to more advanced practice application on the right (Does). Each column can display up to 10 items. Items can be captured as True/False or a count of how many times that action was witnessed. Each item can be commented on. Comments are timestamped.
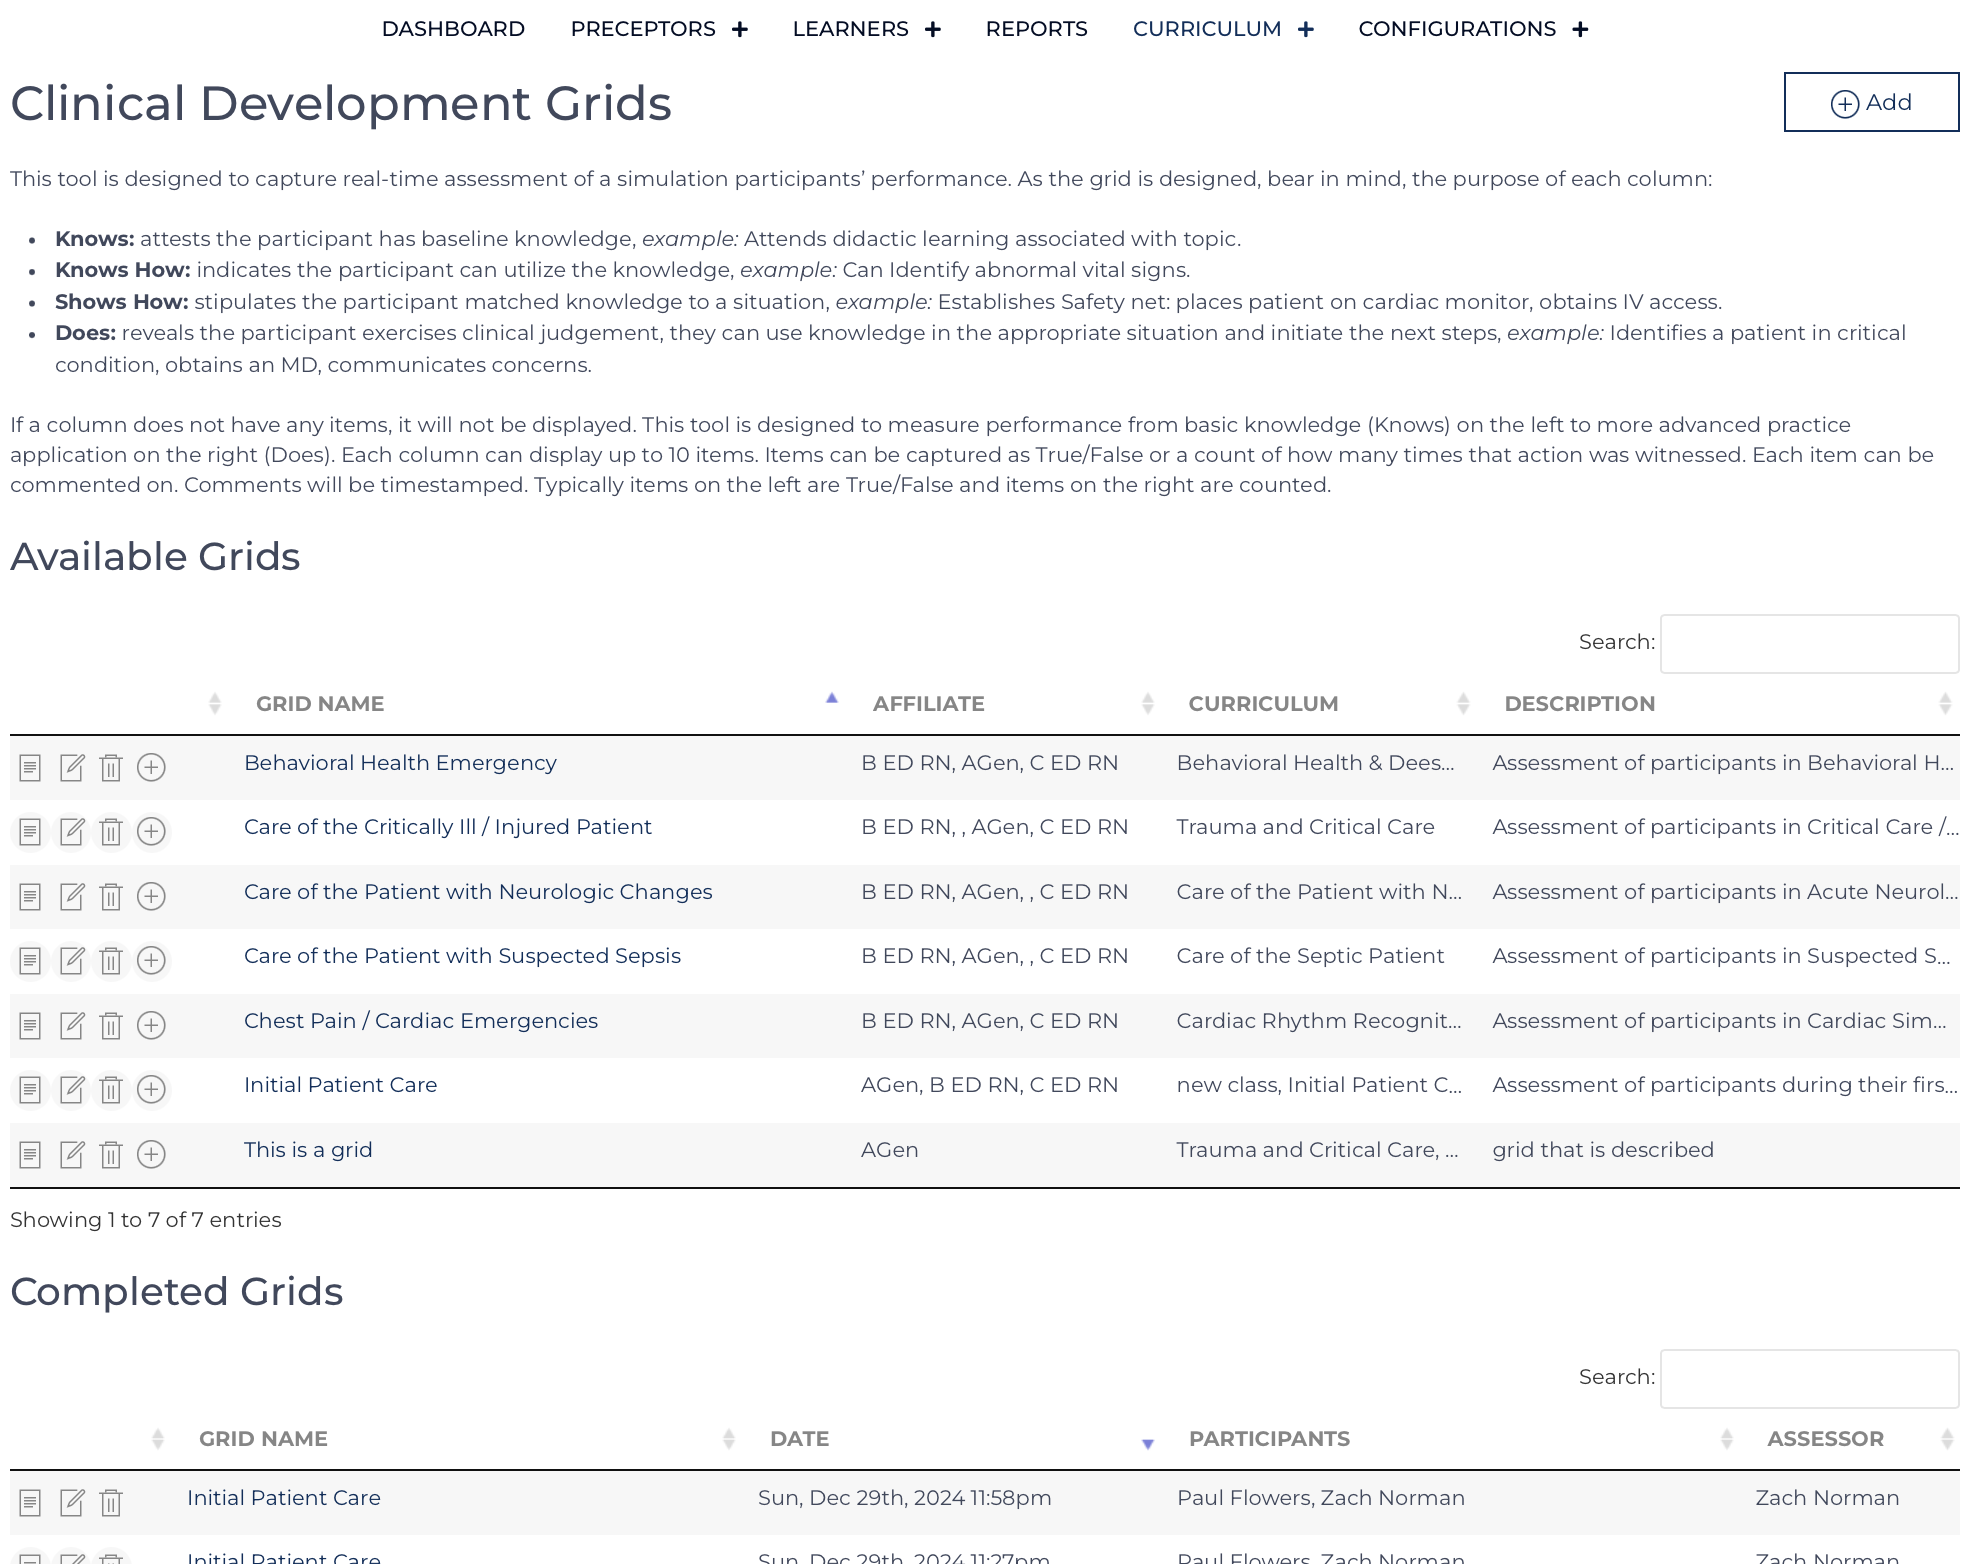
The default view contains two List Views, both can be sorted and searched, the first lists the grids, the next includes completed grids.
Add/Edit Clinical Development Grid
When logged into the Orientation Nurse profile, choose Clinical Development Grid from the Curriculum Drop down. Click on in the upper right corner or use the icons on the table ![]() to edit (highlighted blue).
to edit (highlighted blue).
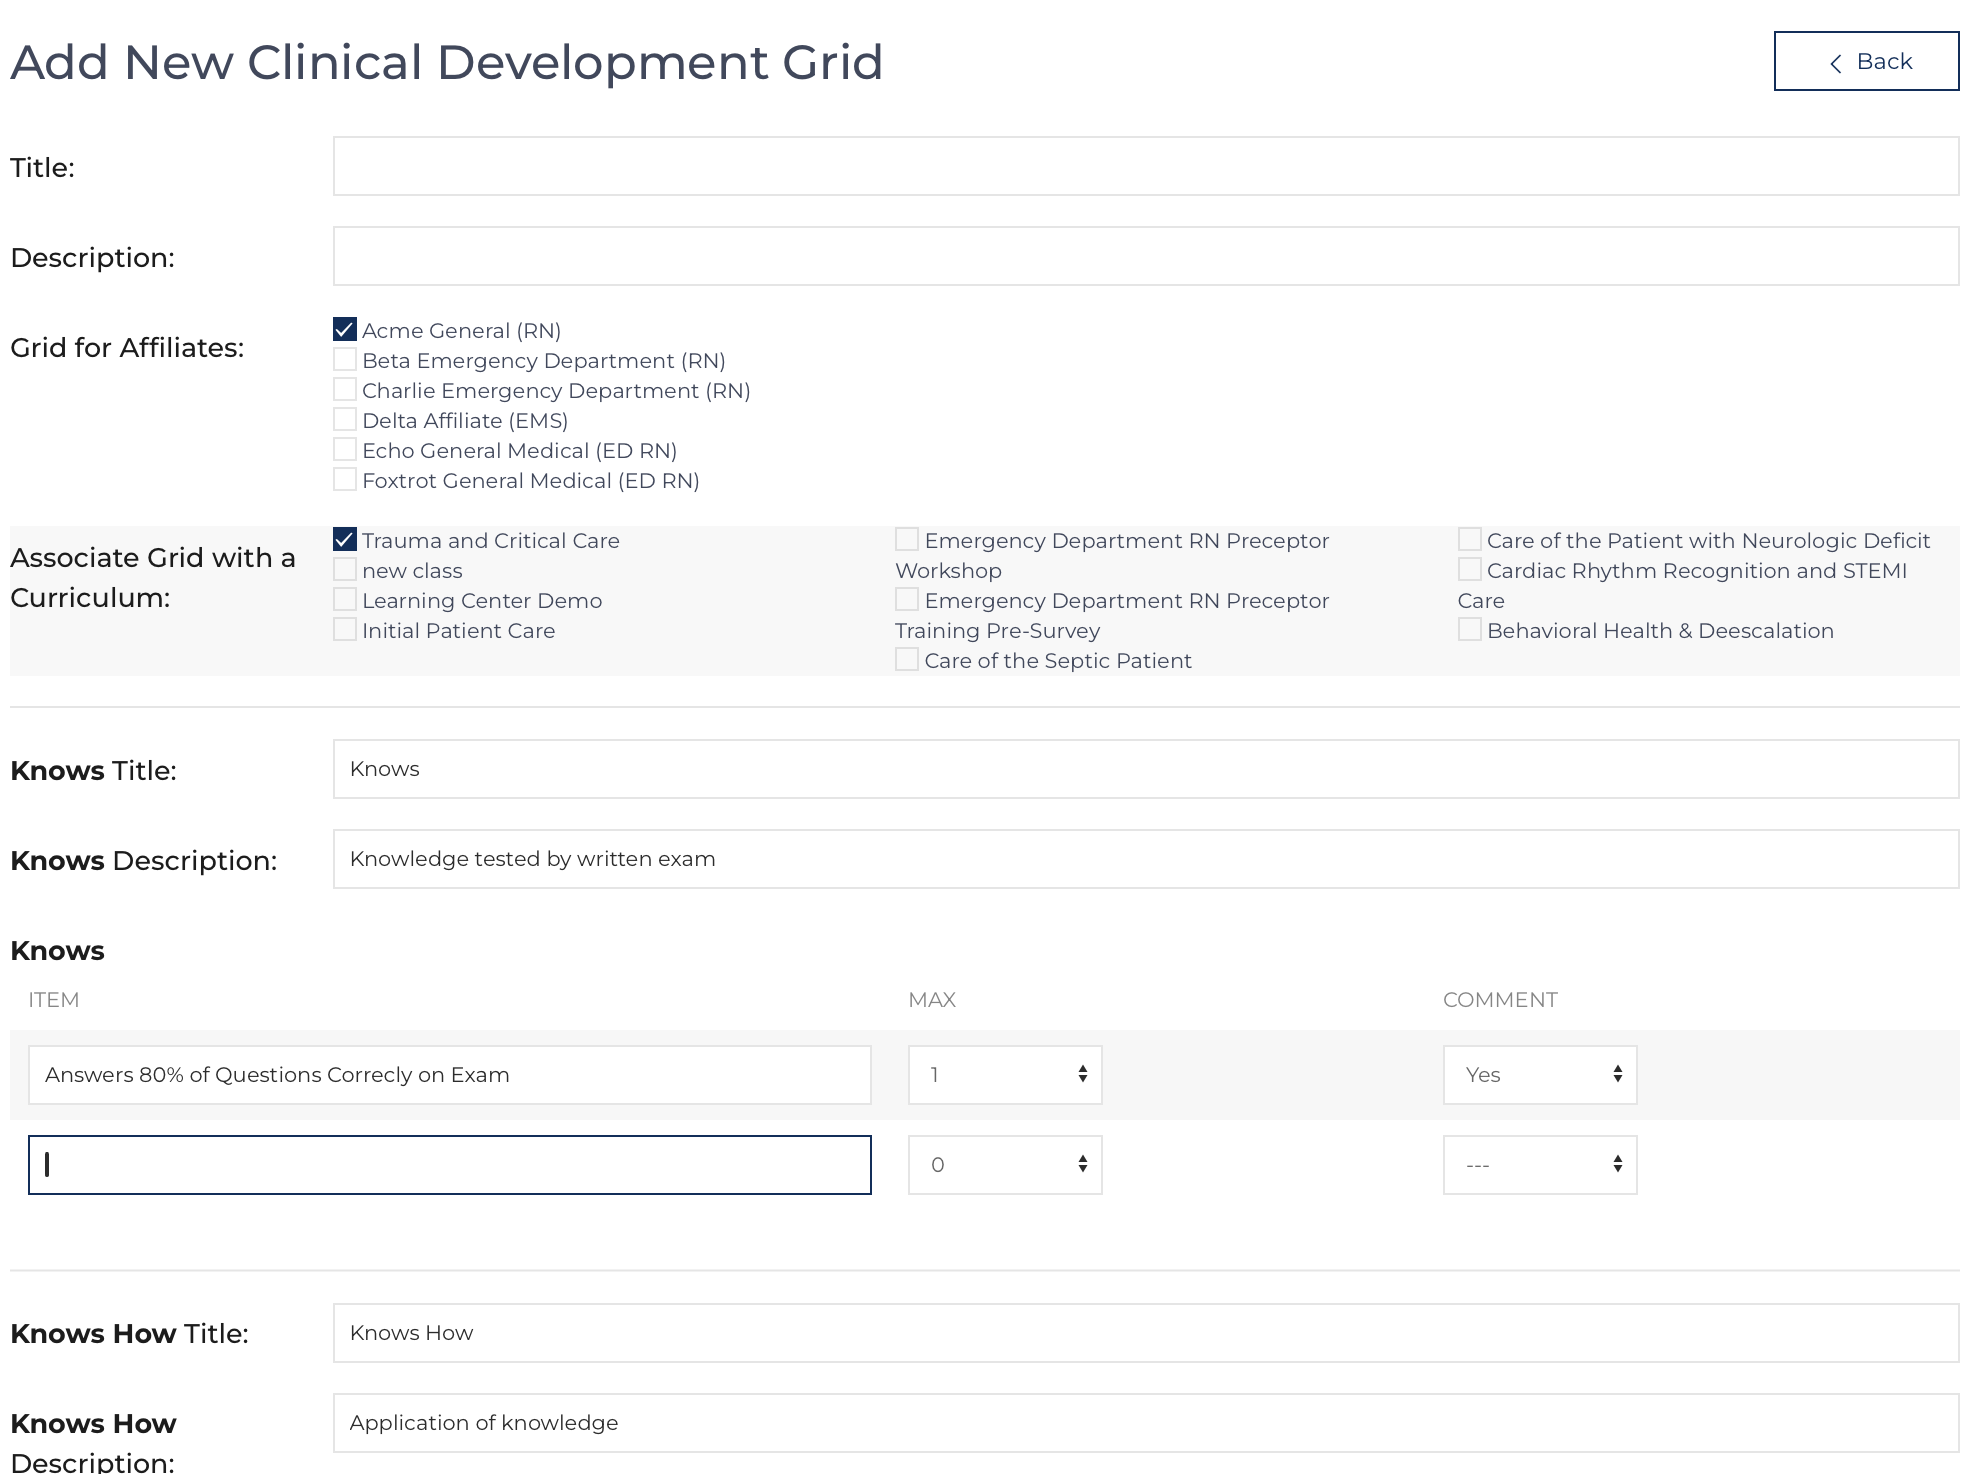
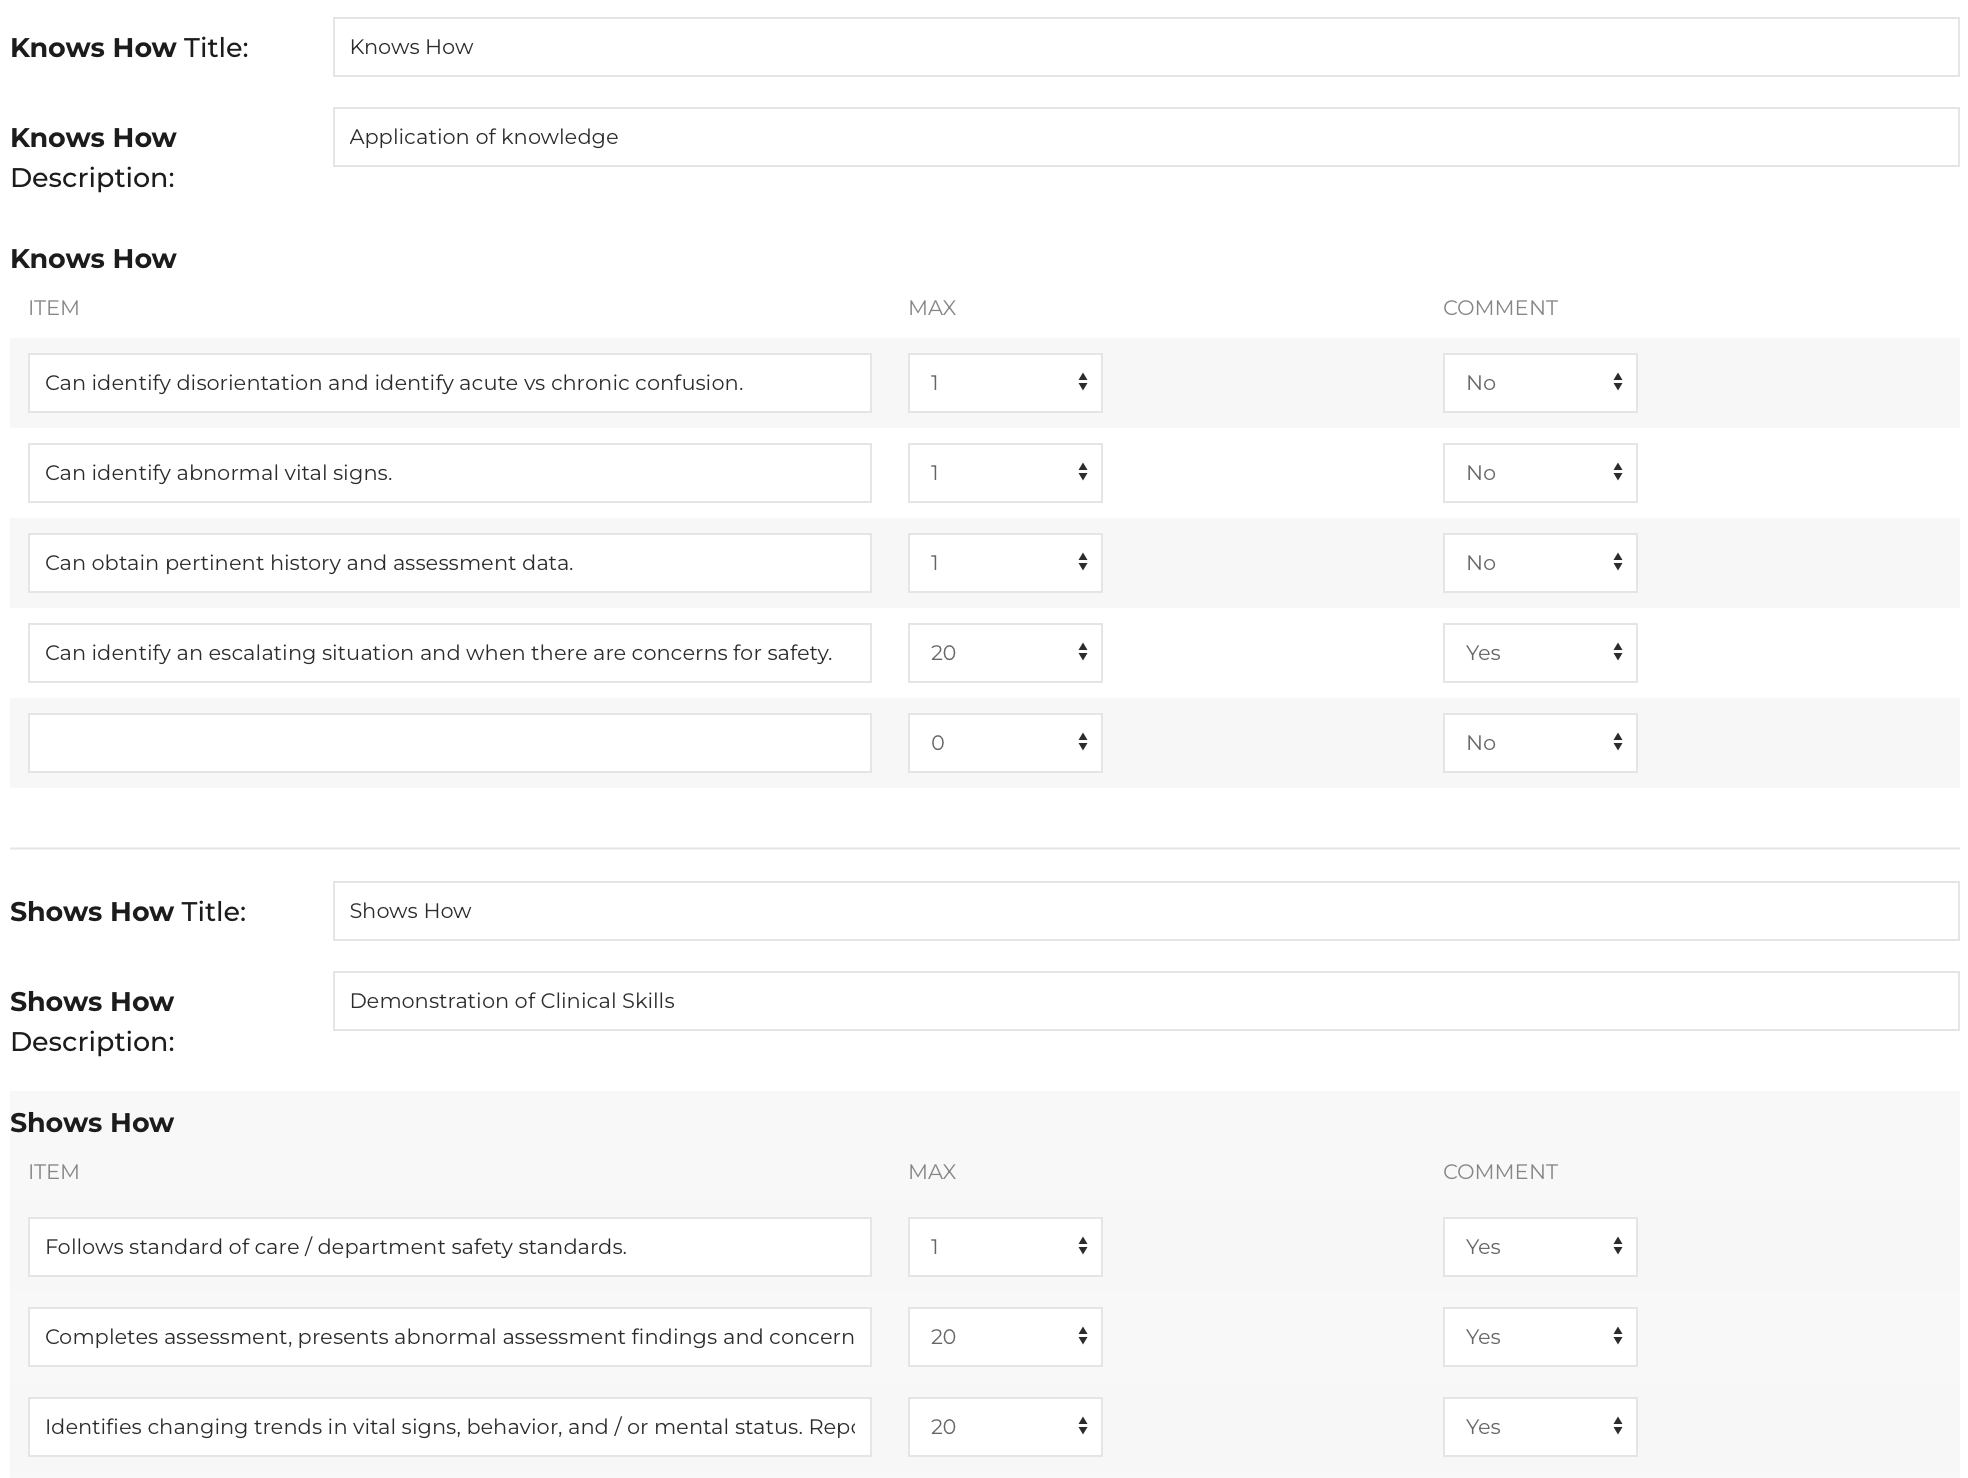
Fill in the fields to create the grid. The required fields are: Title, Grid for Affiliates, and Associate Grid with a Curriculum. All fields can be edited. A Clinical Development Grid can be completed across Affiliates / Roles and be associated with multiple Simulation Type Course Templates. Each grid must be associated with at least one location and one course. When filling in fields for each column: Knows, Knows How, Shows How, and Does (column titles can be edited), there are directions that can be referenced when hovering over the column titles (see Figure to the right). Once an item is filled in, the next line will appear. Should a column not be desired, do not enter any items[2]. The columns do not need to be balanced with the same number of items.
| Display Name | Example / Desired Input |
|---|---|
|
Title |
Text: name of grid. |
|
Description |
Text: describe what will be measured. |
|
Grid for Affiliates: |
Select Multiple: Affiliate / Roles associated with this Grid[3]. |
|
Associate Grid with a Curriculum: |
Select Multiple: Course Template titles associated with this Grid. (Can be multiple, usually 1). |
|
Knows Title |
Text: Knows |
|
Knows Description |
Text: Knowledge tested by written exam. |
|
Knows |
Multiple Items Saved: |
|
Knows How Title |
Text: Knows How |
|
Knows How Description |
Text: Application of knowledge. |
|
Knows How |
Multiple Items Saved: |
|
Shows How Title |
Text: Shows How |
|
Shows How Description |
Text: Demonstration of Clinical Skills. |
|
Shows How |
Multiple Items Saved: |
|
Does Title |
Text: Does |
|
Does Description |
Text: Performance in Clinical Setting. |
|
Does |
Multiple Items Saved: |
Document a Grid
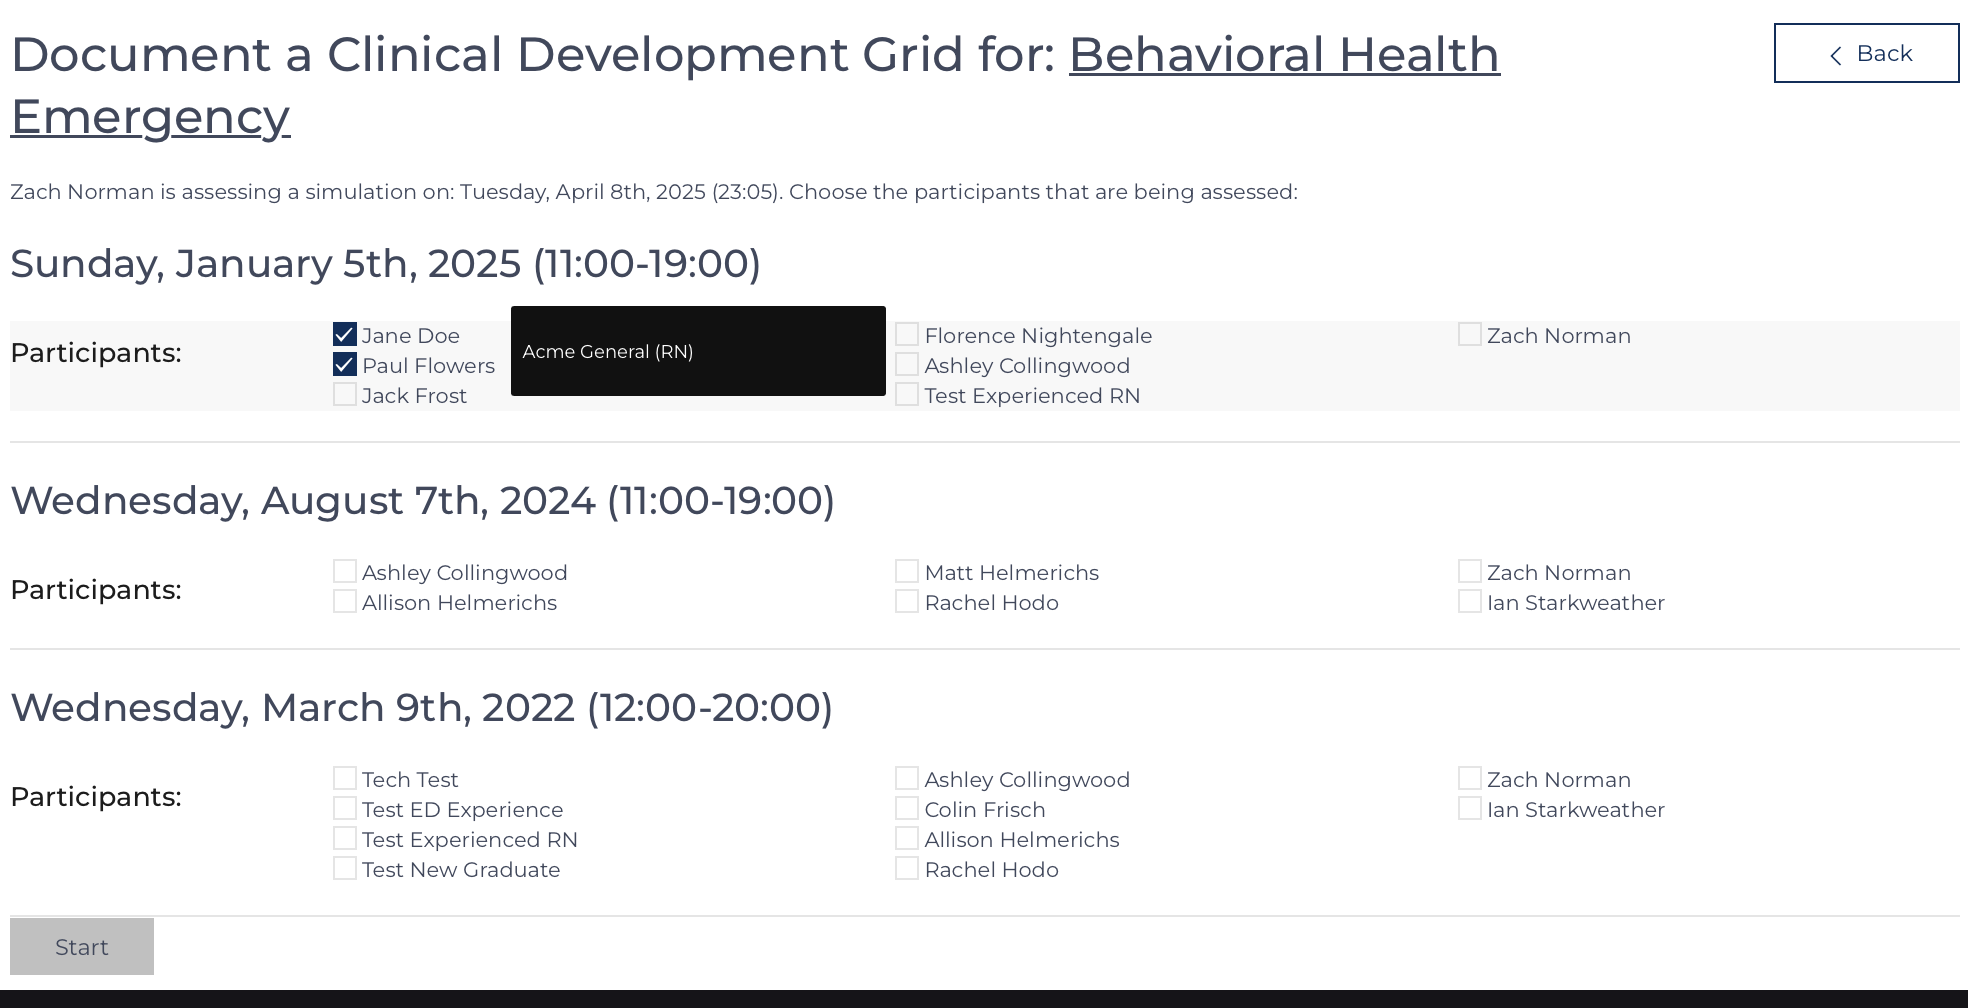
From the Course Instance page click the button: with the grid title. Or click the add icon (highlighted green) ![]() next to the title of the Clinical Development Grid. The screen to the right will open, select the desired participants in the observed encounter.
next to the title of the Clinical Development Grid. The screen to the right will open, select the desired participants in the observed encounter.
Click: to create a new set of #__learning_cdg_answer records, one master record and one record for each Item in each column, a &r=## is assigned to define an instance of the grid being utilized. The display moves forward to the next step &status=record2.
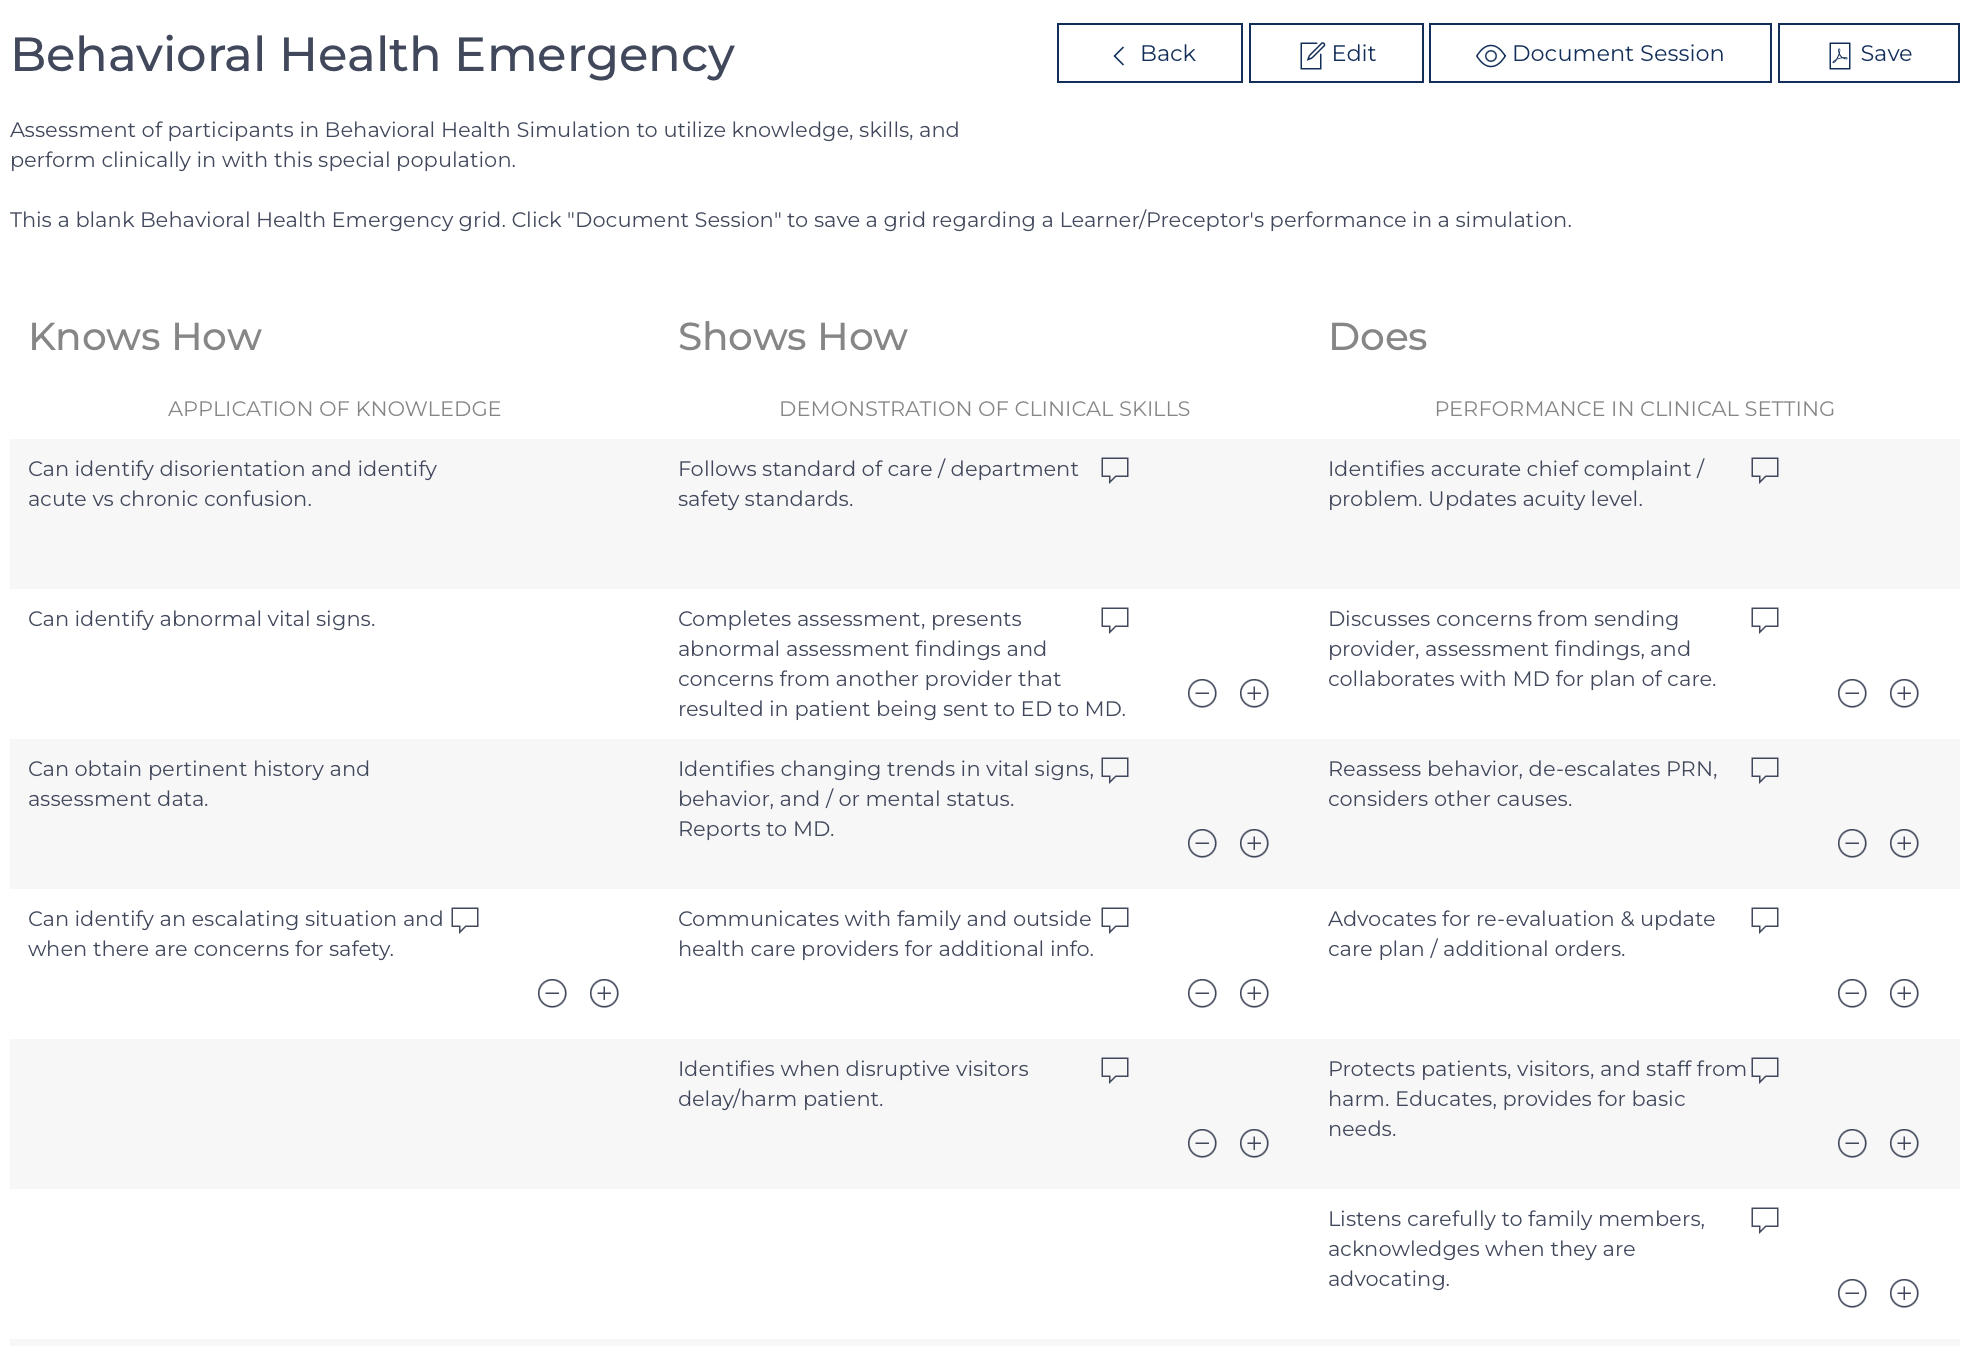
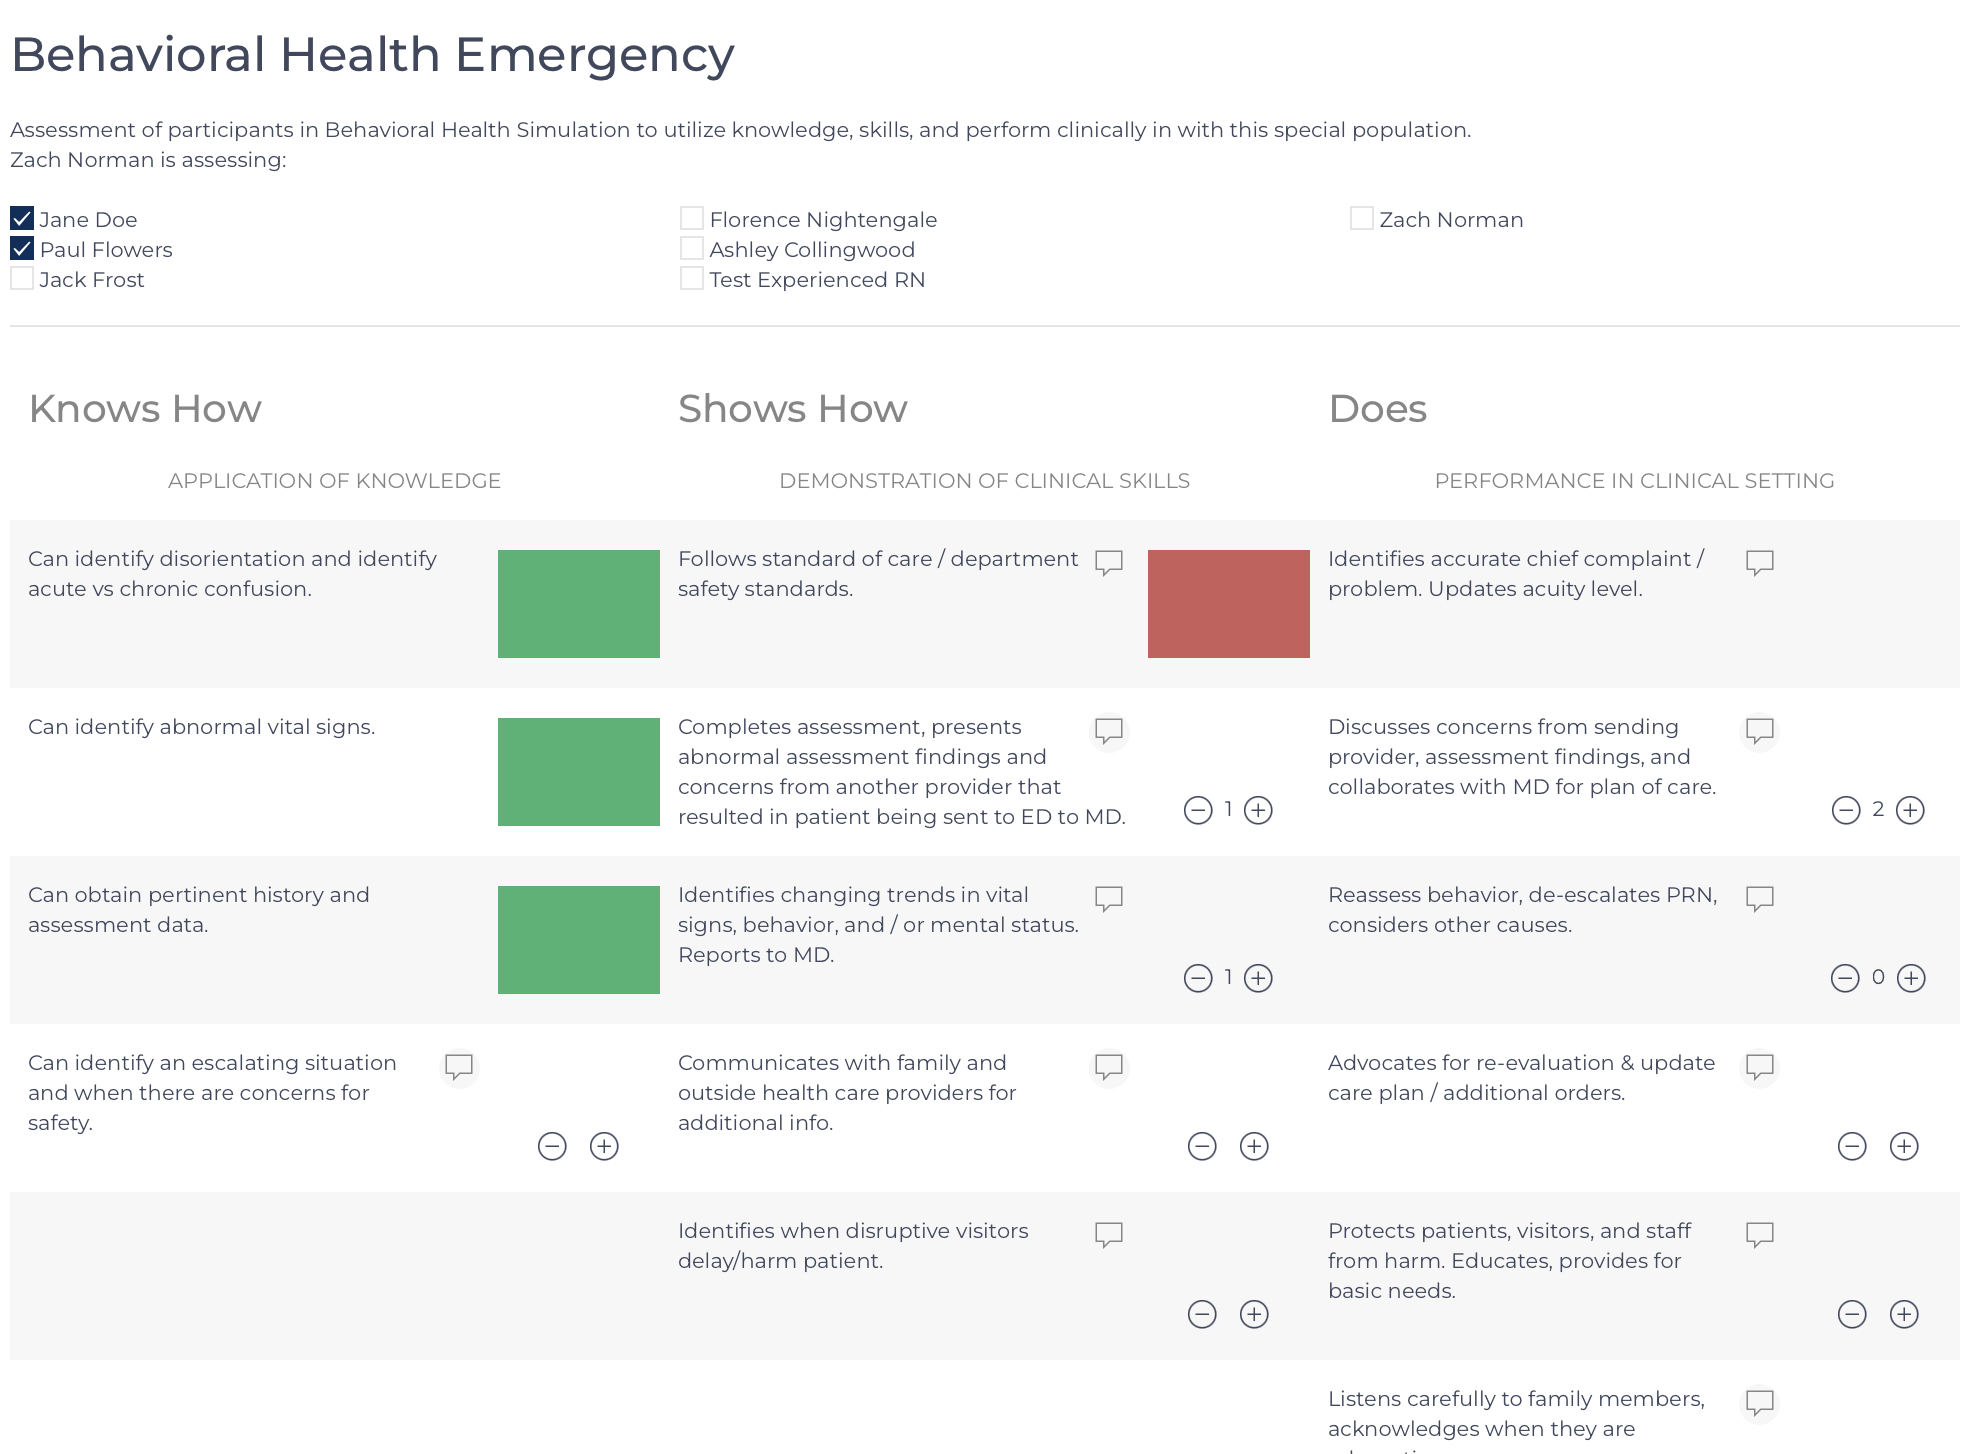
The screen to the left is indented to be used in real-time while monitoring the selected participants complete their simulation. It is designed to be completed on a tablet like and iPad. The comments are time stamped and can be filled using a speech to text option from the device. This becomes an especially powerful tool when pairing the grid with a recording of the simulation. The time stamp can be matched to the time in the recording to review the recording and aide the debriefing.Tap the comment icon to open a comment box.
The timestamp is automatic[6]. When filling-in the grid, the documenter will note the number of times they witness the actions in the statement and any applicable comments. If the Max for the item is set to 1 then the item is treated as a true/false. True is green, False is Red. It is also acceptable to leave the element blank if it doesn’t apply[5].Click: to save the grid. The grid becomes a great debreifing tool as it groups the actions in columns showing with basic knowledge on the left and application of clinical judgement on the right.
View / Analyze Results
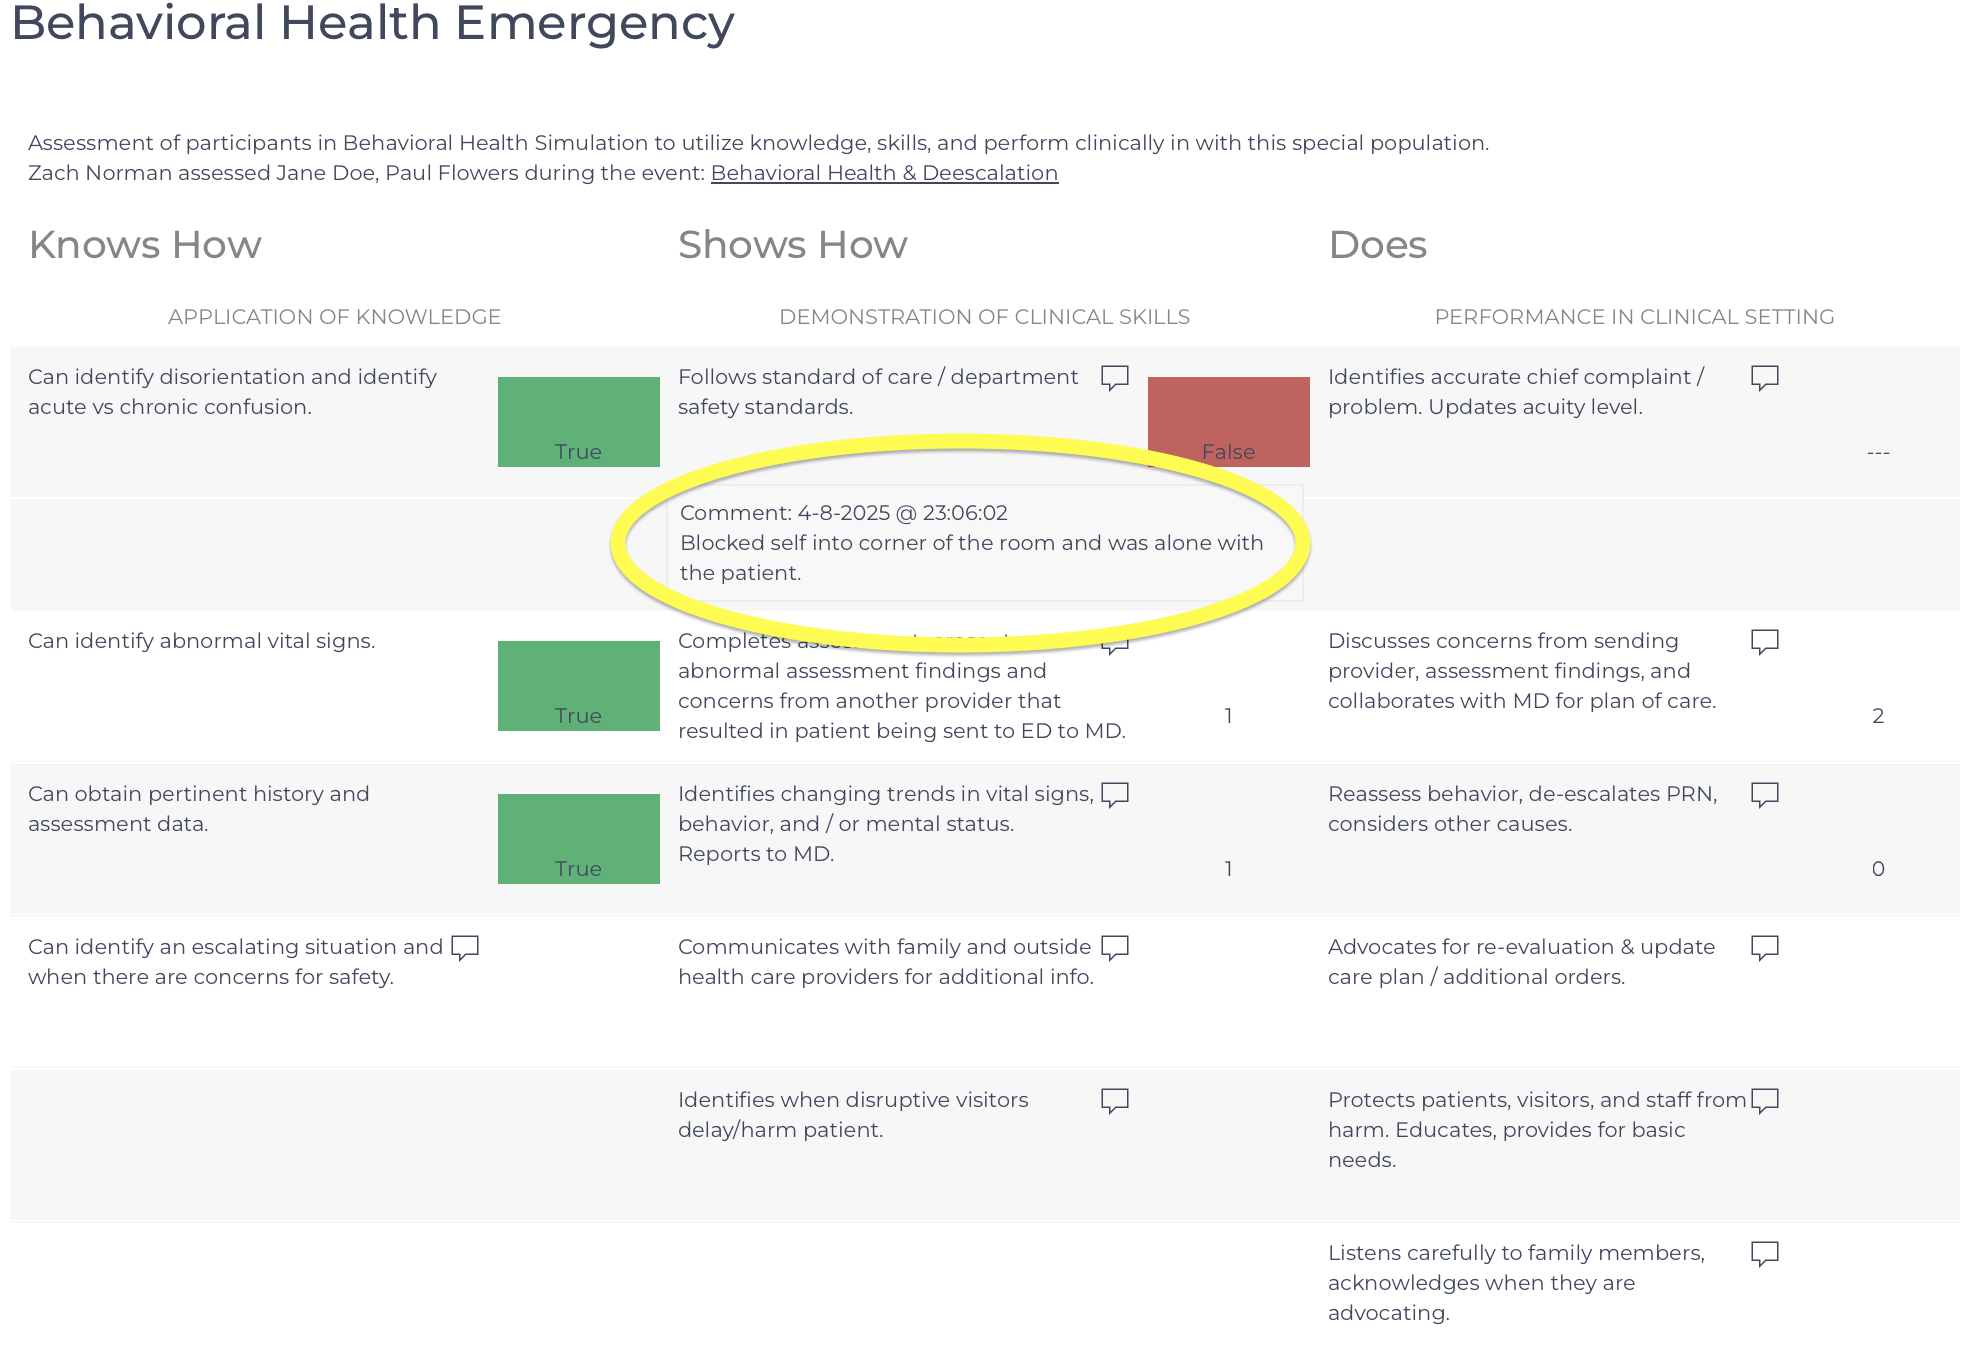
The example grid to the right shows a group of Learners who may have struggled to match knowledge with skill while completing a simulation or while being observed caring for a patient. The time stamps on the comments allow for the faciliator to keep track of what happened when. A single item can be commented on multiple times, each comment is time stampped.
Utilize this tool to faciliate a reflection with the participants. It is not intended to be a grading rubric nor is it intented to be used to penalize or document a participant's failures. It should be used to help the participants realize where they had opportunities and to reflect on what they were thinking when taking certain actions as a means to reframe or reinforce their process in caring for a similar patient.
This is a great tool to use to validate the feedback recieved by the preceptors in their evaluations.
